Showing posts with label Sally Hansen. Show all posts

Monday, 17 March 2014

Nail Art - Polka Dots

Hi everyone! So I know I normally do just reviews of different nail varnishes I was thinking about being a little more adventurous and trying out different nail art styles as series of blog posts, so I thought I would start off simple with polka dots! For my birthday my sister got me a set of dotting tools which vary in size so you can get tiny dots and huge ones! I love the design of the tools them self because you can twist them around and it looks really cool.


Personally I think dots on nails look best when it is white dots on top of colour so I went for the classic black and white polka dot. I couldn't decide whether black dots on a white base; or white dots on a black base would look better so I incorporated a bit of both with an accent nail.


So I started by applying my base coat as I always get a bit nervous when I'm using very dark colours on my nails as I've had a lot of bad experience with my nails staining. I used my Sally Hansen one as it drys so quickly!


Then I applied my base white colour to 4 of my nails and then I painted my ring finger nail with a black base to create an accent nail by inverting the colours. Both nail varnishes are from NYC color and are £2.49.


I applied a second coat of both nail vanishes because I felt the white was a bit patchy and weak with only one coat and I needed it to stand out. Although the black didn't really need a second coat I thought I might as well!


Now for the fun part! I put a blob of the same white nail vanish I had used as a base onto a bit of paper and I read that it made the dots look a lot better rather than trying to paint onto the dotting tool. I chose the largest ball size because I did want quite big polka dots. I dipped it at 90 to the paper straight into the polish and then did the first few dots on my accent nail. Obviously after 1 or 2 you will need some more polish on your dotter so just dip it back in.


It's important to clean your dotting tools because they are made of metal so you don't want them to rust or end up with dried polish on the end. I then did exactly the same putting a blob of black nail varnish onto the a paper and then dotted the remaining 8 nails.


I then sealed it all with my Barry M top coat and tidied up all the bits that went on my skin and they were all done!


I love how they look and got loads of compliments on them today. I think they work really well because they go with everything and look really classic. Dotting your nails is probably the easiest from of nail art so if you don't already have nail dotting tool I would recommend you getting some as they are really cheap if you do a search on Ebay or Amazon. If you don't want to buy some you could always use the head of a pin but I'm not sure it will work as well. Let me know if you think the nail art series is a good idea and if you love the polka dot look as much as I do! Thanks for reading!

Sunday, 2 March 2014

Review of Tanya Burr's Nail Varnish in Little Duck

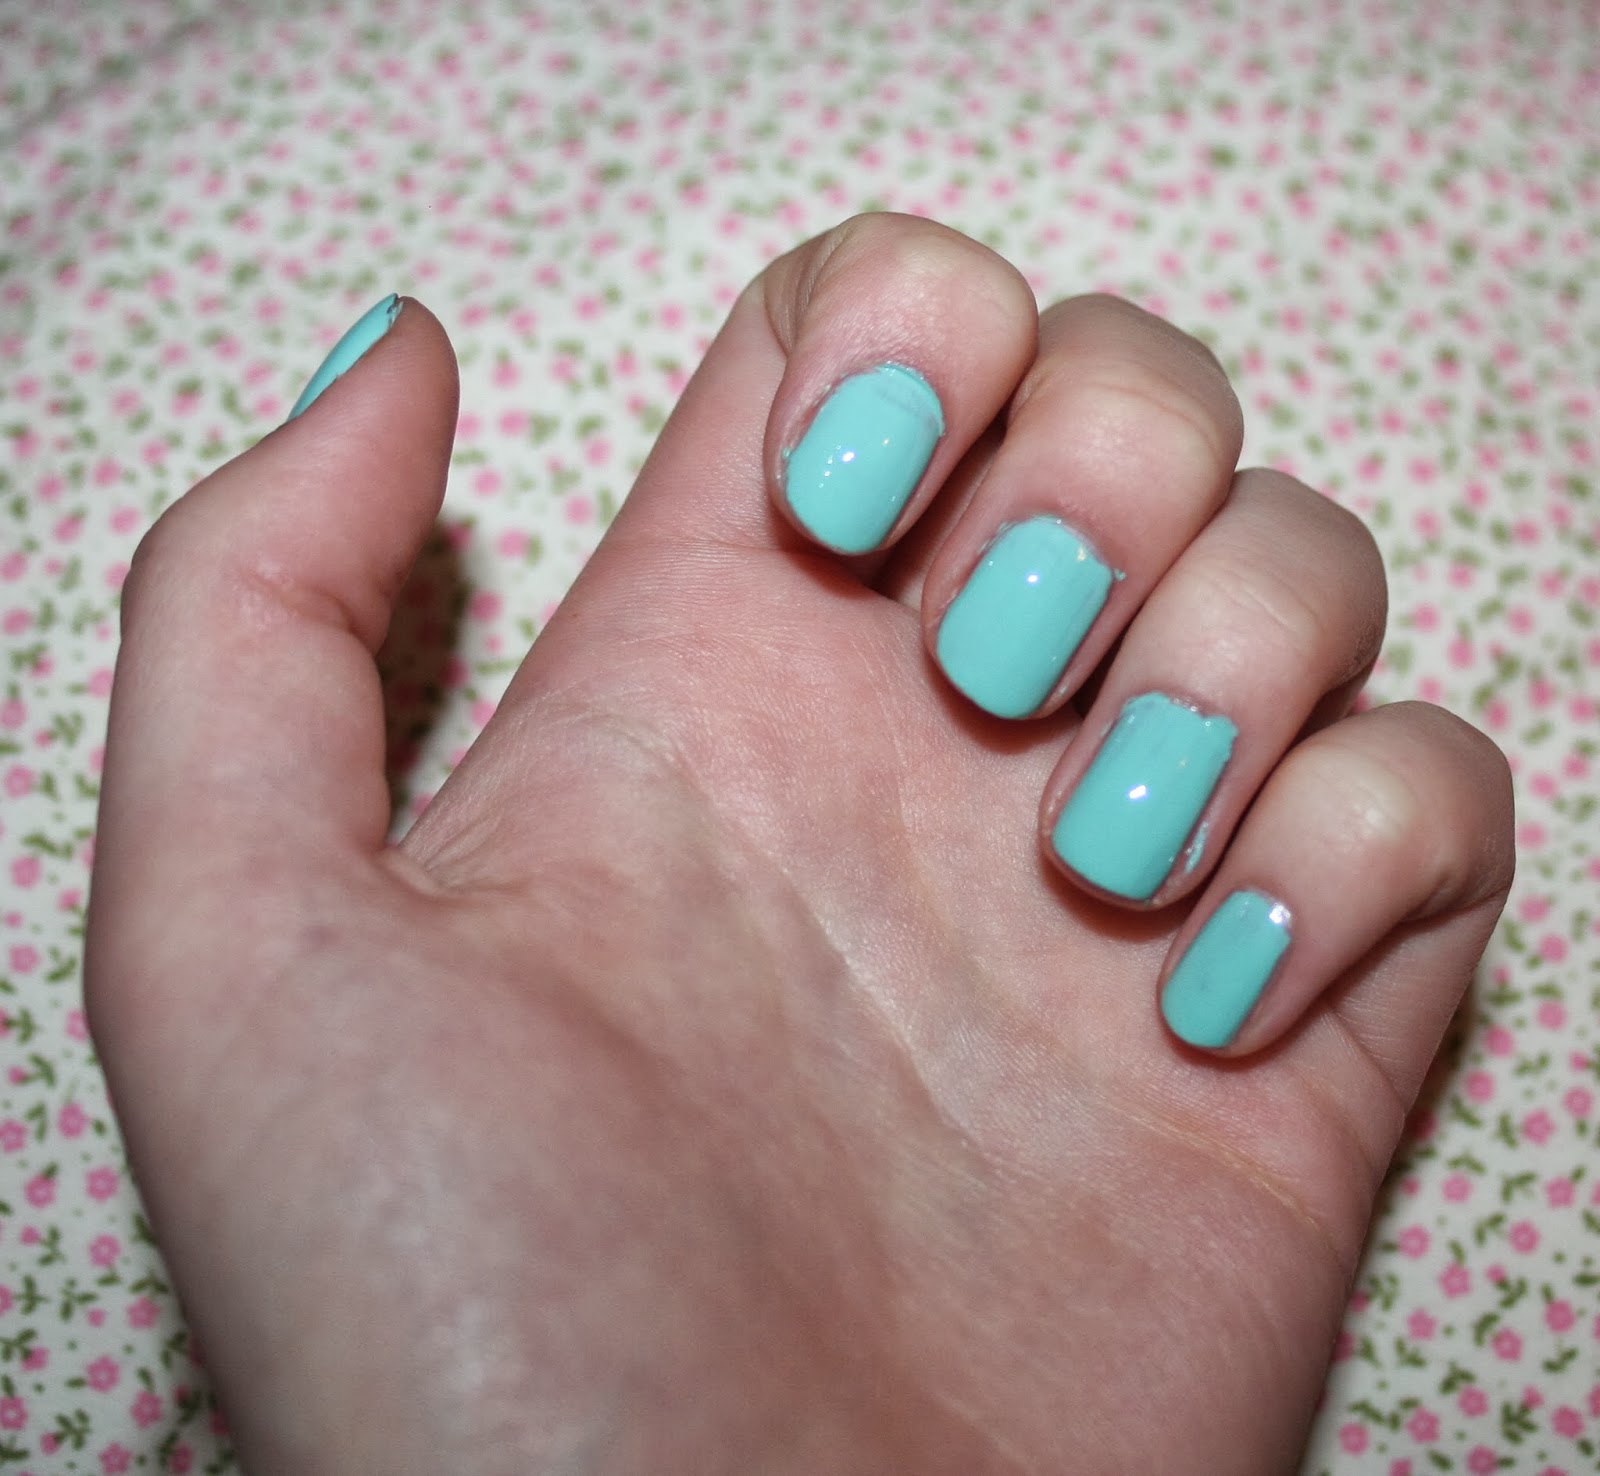
Hi everyone! By now I've have no doubt you will have all heard about the lovely Tanya Burr releasing her own line of nail varnishes and lip glosses! In the collection there are 12 lip glosses and 10 nail varnishes. This is their second appearance already on my blog (I wrote about Penguin Chic here) but to be honest with you I don't actually own this one. The same time that I ordered mine from feel unique for £5.99 my sister got this one, along with a lip gloss, but she has kindly let me borrow it. They are now on Superdrug online so I imagine they will be making there way into store soon! 'Little Duck' is a pastel mint bluey green colour which is perfect for spring and summer if the sun ever decides to come out!


I love the packaging of the nail varnishes especially with her signature on the front of the bottle. I've also just noticed there is a little heart on the top of the lid which had escaped my attention before. I didn't have this problem with my Penguin Chic nail varnish but I found with this one the brush was a little frayed. It wasn't a disaster it just made it a little harder to apply.


I used my new Sally Hansen base coat this time which I got from Fragrance Direct at a bargain price of £1.50! It's cheaper than my usual Barry M one and dried a lot quicker which is a huge bonus!


I then applied the first coat of Little Duck. The consistency again felt very similar to the Barry M Gelly Collection and although it's not advertised as a gel nail varnish I think it must be. I did feel that it went on slightly thicker than Penguin Chic did and without a doubt only really needed one coat. It's so glossy which I absolutely love but as the coats went on quite thickly I had to wait longer between coats for them to dry which was a little annoying.


I decided to apply a second coat anyway just to strengthen the polish from chipping.


I also applied my Barry M top coat which was something I didn't do last time. In terms of using a top coat to make them more shiny you don't need to; I simply put one on to prevent chipping. Something I found with Penguin Chic was even without a top coat by the end of the week they were still pretty much perfect which is great because I normally get to Friday and my nails have chips all over the place.


Although the price is a little more than I would pay for a normal nail varnish it is without a doubt worth it because the quality is amazing and they live up to their chip resistant name! I would definitely recommend you have a wander into Superdrug when they are released in store to have a proper look at all the colours! Let me know if you have or are going to try it out! What is your favourite colour from the collection? Thanks for reading!

Sunday, 23 February 2014

Review of 'Barry M Silk Collection' in 'Heather'

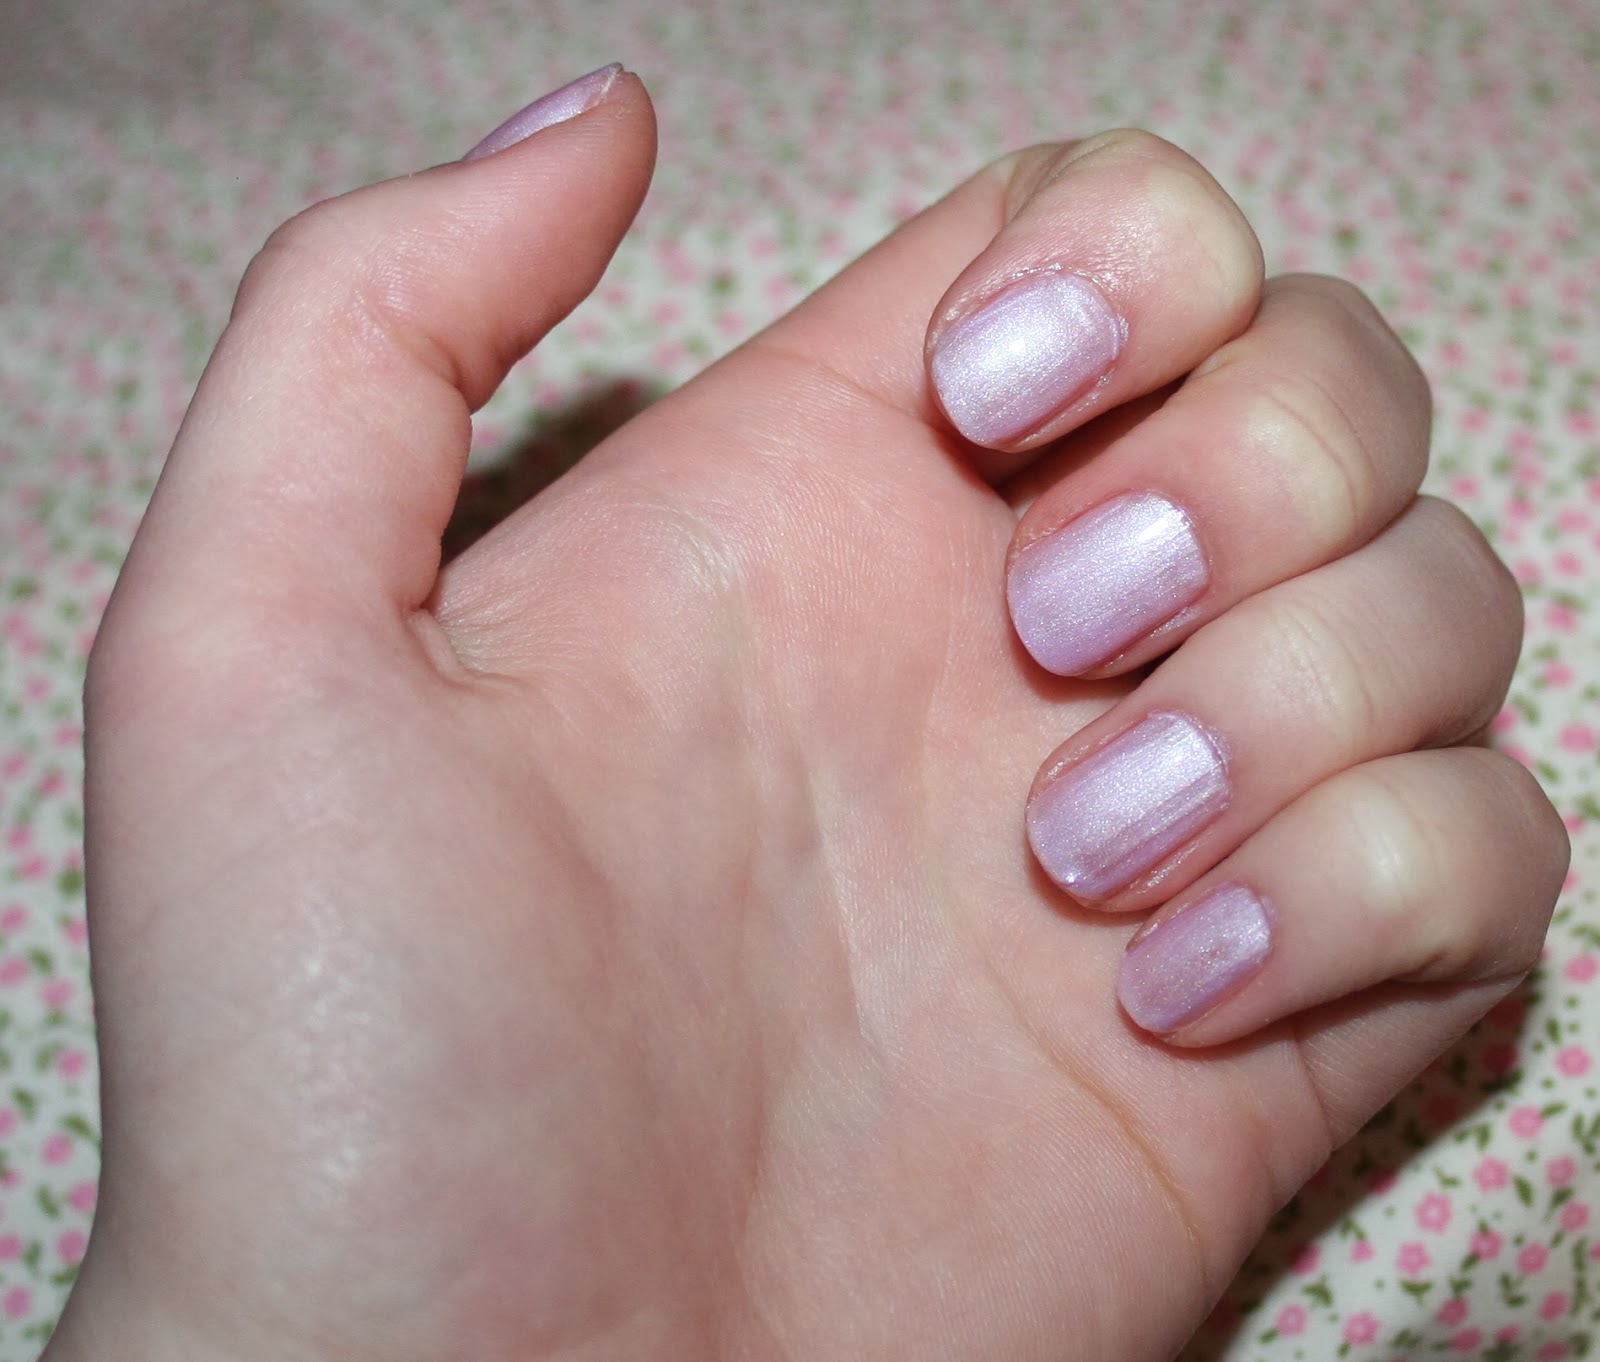
Hi everyone! We slowly easing our way out of winter which means it's nearly spring time meaning new spring collections are being released! Barry M have released their spring collection in the form of these new 'Silk' nail varnishes in 6 different colours. I picked up the colour Heather for £3.99 as I thought out of the 6 it was the one I'd be most likely to wear. It's sort of a lilac colour infused with pink and it's definitely not as dark as the colour I'd associate heather with is.


I don't really feel that this silk trend is a new thing as I remember the kids kind of nail varnishes used to have a similar look and to be honest I never really liked it because I always felt the brush strokes were really visible. However, I did discover that this drys matte which is something I don't remember my old ones doing which is why I wanted to give it a go.


I used my Sally Hansen base coat first which dried super fast; always a plus with nail varnishes!


I then applied the first coat of colour. It wasn't too streaky like I remember my old ones being and if I was in a rush I think it looked actually okay with just one coat of colour. It drys really quickly and once it was dry it sort of reminded me slightly of my holographic one from Topshop. It also seemed to have a sweeter scent to normal nail varnishes when I was applying it but it still dried with no scent!


I applied a second coat even though one probably could've been enough but I had the time! I found it was better to kind of dab it on or just apply a thicker coat because it eliminates any sign of brush strokes.


Originally I didn't apply a top coat because I thought it would ruin the matte look but I did test a top coat out on one nail and it didn't actually look too bad. I don't think I'll put it on the rest though as the matte finish is what I think makes this nail varnish original.


Personally it's not my favourite kind of nail varnish because I'm not too keen on matte finishes and it just reminded me of something a small child would wear on their nails when they had first been allowed to paint them. But despite of that the nail varnish it's self is just like all the others from Barry M in quality so if you like that style I'd recommend you go check it out! Let me know if you've tried any others from the collection and which is your favourite, thanks for reading!

Sunday, 16 February 2014

Review of Tanya Burr's Nail Varnish in Penguin Chic

Hi everyone! So I'm sure you have all heard about the lovely Tanya Burr releasing her own line of nail varnishes and lip glosses and if you haven't where have you been! In the collection there are 12 lip glosses and 10 nail varnishes. I ordered mine from feel unique but they are now on Superdrug online so I imagine they will be making there way into store soon! I chose 'Penguin Chic' because it's not a colour I have at all in my collection and I didn't want to just be buying one for the sake of it at the price of £5.99. It's not a hugely costly product but it is a little dearer than my usual choice of Barry M!


Online I have to admit it looked more of a grey but when it arrived as you can see it's sort of a browny grey kind of colour which isn't a bad thing - it's just different! I love the signed packaging as I think it really lends a personal touch to the product and looks really cute.

I used my new Sally Hansen base coat this time which I got from Fragrance Direct at a bargain price of £1.50! It's cheaper than my usual Barry M one and dried a lot quicker which is a huge bonus!


I then applied the first coat of Penguin Chic. The consistency feels very similar to the Barry M Gelly Collection and although it's not advertised as a gel nail varnish I think it must be. I found with the first coat it was a little patchy is some places but that just be because I put on pretty thin coats. I couldn't believe how glossy it was though! I hadn't even applied a second coat or top coat and apart from a little patchyness it looked ready to go!


I then applied a second coat of about the same thickness as before and they were done! I didn't apply a top coat because I painted them quite late at night and was worried that another coat wouldn't dry before I went to sleep and I really didn't want them to smudge.


In terms of applying a top coat for a more glossy effect you really don't need it. It's so shiny and gel like the only reason I would apply a top coat is to protect the colour from chipping. I've worn this on my nails for a few days now without a top coat and they still haven't chipped which I'm very impressed with!


Although the price is a little more than I would pay for a normal nail varnish I would definitely recommend you have a wander into Superdrug when they a released in store to have a proper look at all the colours! Let me know if you have or are going to try it out! What is your favourite colour from the collection? Thanks for reading!

Sunday, 2 February 2014

Fragrance Direct Haul

Hi everyone! I know you shouldn't start with an apology but this is going to be a really quick small post because I've been so busy this week with Guiding stuff, my DT coursework deadline and preparations for mocks! However, I will post another one during the week to make up for it!

So I just wanted to tell you about this amazing website - Frangrance Direct! My sister came across it and then told me about it and now I'm telling you - it's basically a website that primarily sells perfumes for great discounted prices but also has a huge selection on make up, hair products and items for your bath & body and more!

I ordered an Essie nail varnish in All Tied Up, OPI nail varnish in Congeniality Is My Middle Name , Sally Hansen nail varnish (just a base coat), Bourjois 3D Effect Lip Gloss in Coral Artistic and an UNE Smart Length Mascara all for £13.22 (which included P&P)! That was basically a saving of just more than £30 which is amazing; especially being on a tight budget! I did question how they were so cheap, so I did a little bit of snooping around and it seems some were sent to shops as testers but never used, or are a slightly older range (I know the Essie nail varnish I got was from their Summer 2012 collection) and some are just missing a bit of packaging but who keeps the boxes anyway!


I was so happy to test mine out when they arrived and they were all full and sealed still in their original wrappers and cosmetic seals which gave me great confidence in the company! Be prepared for some individual item reviews soon! They tend to only have a small amount of stock for each item so I'm checking back every week to see what new stock is in and I will without a doubt be placing an order again! Let me know if you've got anything from Fragrance direct before or if you'll use it in the future! Thanks for reading!