Showing posts with label Cheap. Show all posts

Wednesday, 16 April 2014

Homemade Disney Costume - Esmeralda

Hi everyone! So something a little different to my usual nail or travel related posts but I really wanted to share this because I was actually pretty impressed with my costume! For my friends birthday she decided to have a Disney themed dress code so I decided to go as Esmeralda from The Hunchback of Notre Dame! My other friends dressed as Buzz Lightyear, Sleeping Beauty, Mulan, Rapunzel, Minnie Mouse, Melody (The Little Mermaid 2), Cinderella, the Wicked Witch from Snow White and the birthday girl was Jasmine so there was a real mix!


I basically got my whole costume for under £20 even though I pretty much bought everything new from Ebay! The top I picked up from here for only £5.95 which included P&P. It's a little bit see through but I can't really complain and to be honest I could quite easily wear it again dressing up as a pirate or something!


The skirt I got from the same seller on Ebay again for £5.95 and I actually really like it! It's got a long thin layer and then a shorter layer of the same material making sure your aren't revealing too much! I'll probably end up wearing this again somewhere warm on holiday. Both this and the top came within a couple of days of ordering which I was very impressed with!


Also from Ebay, but a different seller this time, I bought a sort of corset waist band for £2.79! I was looking for something greeny blue but had no luck so had to settle with this black one. I wouldn't wear it out casually but it would go well with the top for a pirate themed outfit and you can do it up very easily as there is Velcro at the back. I ordered this the week of the party and it arrived within plenty of time which was lucky!


I already had a waist scarf which my aunt bought when she was on holiday a while ago so although it was dark blue and not purple I didn't really see any point in buying a new one just for that evening but they are very easy to get a hold of if you don't have one!


Whilst in Spain last week I bought this lovely hoop earrings which have purple detailing on them so I thought they would be perfect to wear! I know she just wears plain gold hoops but you've just got to make do with what you've got really!


I curled my hair and some black pumps and that was my finished look!


Hope this gives you some inspiration if you've got any fancy dress parties coming up and I would love to see any costumes you've made for parties! Thanks for reading!

Sunday, 2 February 2014

Fragrance Direct Haul

Hi everyone! I know you shouldn't start with an apology but this is going to be a really quick small post because I've been so busy this week with Guiding stuff, my DT coursework deadline and preparations for mocks! However, I will post another one during the week to make up for it!

So I just wanted to tell you about this amazing website - Frangrance Direct! My sister came across it and then told me about it and now I'm telling you - it's basically a website that primarily sells perfumes for great discounted prices but also has a huge selection on make up, hair products and items for your bath & body and more!

I ordered an Essie nail varnish in All Tied Up, OPI nail varnish in Congeniality Is My Middle Name , Sally Hansen nail varnish (just a base coat), Bourjois 3D Effect Lip Gloss in Coral Artistic and an UNE Smart Length Mascara all for £13.22 (which included P&P)! That was basically a saving of just more than £30 which is amazing; especially being on a tight budget! I did question how they were so cheap, so I did a little bit of snooping around and it seems some were sent to shops as testers but never used, or are a slightly older range (I know the Essie nail varnish I got was from their Summer 2012 collection) and some are just missing a bit of packaging but who keeps the boxes anyway!


I was so happy to test mine out when they arrived and they were all full and sealed still in their original wrappers and cosmetic seals which gave me great confidence in the company! Be prepared for some individual item reviews soon! They tend to only have a small amount of stock for each item so I'm checking back every week to see what new stock is in and I will without a doubt be placing an order again! Let me know if you've got anything from Fragrance direct before or if you'll use it in the future! Thanks for reading!

Sunday, 15 September 2013

Review of 'NYC Quick Dry Nail Polish' in 'Full Metal Jacket'

Hi everyone! I bought this nail varnish when I went through the phase of buying nail varnishes from NYC as they were on a 3 for 2 deal and are only £1.79 each anyway. I had picked it up with the intention of using it at Christmas to jazz up my nails, but I thought I would give it a little test now!


It's a very strong gold metallic colour and I wasn't too sure about wearing it as I think sometimes it looks a little bit tacky when people have gold nails. I don't really like gold anything to be honest - most of my jewellery is silver. I think this dislike of gold has come from seeing pirates in films and cartoons with gold teeth.

I applied my base coat, which some of you may have noticed is not my usual Barry M, but in fact my old Collection one! This is basically because I couldn't find my Barry M one when I was painting my nails (although I've found it since).


I then applied the first coat of colour and was pleasantly surprised! With only one coat my nail was fully covered without the usual streaky appearance that lots of the nail varnishes from NYC seem to have. You could definitely get away with only applying this one coat, but I wanted to apply a second more to protect the nail varnish from chipping!


So the second coat made very little difference to the colour, which is great as it proves you can get away with only applying one coat of colour!


I didn't apply a top coat as I wanted to test out something on top of it which you will be able to read about in a few days time!

I love how well this nail varnish goes on and how your nail colour looks the same as the bottle after one coat, but I'm still not sold on the idea of having purely gold nails. If you like having metallic nails then I would, without a doubt, recommend you get this as it is one of the best ones from the NYC collection. If you have never tried metallic nails then this would the perfect one to try out because even if you don't like it you won't have spent a huge amount on it.

Do you like metallic nails or have you never tried them? Let me know! Keep an eye out for what I tried next with this look and thanks for reading! (:

Monday, 2 September 2013

Review of MUA Lipsticks

Hi everyone! Until about 3 months ago I'd never heard of  the brand MUA. That was until my sister came home raving about an eyeshadow pallet she had just bought. It's basically a brand that is only available Superdrug or online and it is so incredibly cheap but the amazing thing is although the price is low the quality of the products isn't (or at least the ones I've heard about)!


As you may know I don't really wear much makeup - a little concealer and a dab of mascara and I'm good to go! But I've been feeling a bit facial/cosmetically boring lately so I thought I would buy some lipsticks to spice things up so I went to have a look at MUA in my local Superdrug and saw the lipsticks were only £1!!!

The packaging isn't anything fancy, but then again, neither are some other high end lipsticks such as some of MACs lipsticks. I quite like the simple black tube with a silver ring as a break in the middle as it I think it looks quite elegany. I absolutely love that you can take off the little pot on the bottom of the tube and use it with a brush when your lipstick runs out! I thought this was a brilliant idea as it gives you some time if you run out and can't get to buy another one straight away.


The first shade I picked up was 'Shade 1' which is a very deep wine red. I've especially seen Zoella wearing a dark shade of red on her lips in her recent videos and it looks really nice on her so thought I would give it a go!

It's really nice to apply, the colour goes straight onto your lips and your lips feel sort of moisturised rather than the sticky feel some lipsticks have.


I think it's a little dark for me personally as I'm pretty pale and it just makes me look paler but that might just be because I'm not used to wearing anything like this.Maybe if I wore a little more face make up, like foundation, it might look better?


The second one I picked up was 'Shade 14' which also has the name 'Bare' on the label. It's a nude colour that looks amazing on.

This one looks the best on in my opinion and it really moisturises your lips at the same time!


This was my favourite one out of the 4 as I am happy to wear it out as it isn't too bold. I've worn it quite a few times now and I think it looks gorgeous!


The next one I picked up 'Shade 13' which is a much brighter red than previously and more of the classic red you see lots of people wearing.

This one was similar in application to the dark red; it went on smoothly and felt really good on my lips.


I love the colour but as I'm just starting out wearing lipsticks I think it might be a little too bright for me at the moment as I'm still not 100% comfortable wearing lipstick out. Fingers crossed that will change!


The final shade I picked up was 'Shade 2' which is a sort of bright pink colour which I found matched my hair when I dip dyed it for the second time.


Again it's really nice to apply. I felt this one more so than the first seemed a bit cakey but once I had blended it with my finger it was good to go!


I really like it as it's something different from the classic red and the simple nude colours but I'm not sure many occasions have arisen where this colour matched with my outfit but hopefully I'll find something soon!


I really like all of the MUA lipsticks I have tried and for a £1 it's an absolute bargain! I would wholeheartedly recommend you having a look at the lipsticks MUA has to offer as they've got quite a broad selection for you to choose from if you didn't particularly like the colours I picked up. I know I will be going back in and picking up a couple more in different shades.

Let me know if you've tried anything from MUA and what you thought about. Thanks for reading!

Tuesday, 27 August 2013

Review of 'MUA Nail Constellation' in 'Pisces'

Hi everyone! So as you know I normally just do plain nail varnish reviews but I thought I would try something different! I'm also thinking of doing some patterned nail tutorials and things like that in the future, if you are interested in that?

This isn't mine by the way, it's actually my sisters and she kindly let me borrow it so I could try it out. I believe you can buy them at £3 from MUA which is a brand you can only find online or in Superdrug and I'd not heard of this brand until pretty recently but they basically do super cheap make up and from what I've heard most of it is actually pretty good!

So I am using the colour Pisces (which is actually my star sign) but I think I am right in saying there are 4 other ones in a variety of colours. This one is mainly green with bits of pearly pink and white infused into the mixture.

I have already painted my nails with a colour I found to match the green balls best which I got from the NYC and you can read a review of that HERE . I didn't have any that matched the pearl or white but I think it would have looked more effective if I had been able to use a pearl colour as my base.


So what you have to do is paint your desired nail with your base colour and whilst it is still wet and tacky pour the small balls onto you nail. This can be a bit messy so make sure you have something underneath to catch the mass of stay ones! Once your nail looks fully covered gently push the balls down onto your nail and then apply a clear top coat on top to secure them.

My whole nail is covered! Honest! It's just that the green balls blend in the my base colour
I only chose to do one nail thus acting as an accent nail because I had never tried anything like this and thought it might be a little bit too much if I did all my nails like this!


Although the bottle is very well designed to pouring the balls out it is a bit tricky getting them back in. For some reason I couldn't remove the funnel part of the bottle as you are supposed to do so I have to try and pour the stray balls back through the tiny hole they came out of! I managed to get there in the end but it was a bit annoying.I'm sure by removing the funnel it is a lot easier to pour the balls back in but I was just unable to do so.

Excess balls 
I quite like the overall effect although I did find it strange to have things sticking out of my nail! Considering the price of £3 I would recommend this as it is a great way to jazz up your nails although personally I would try a different colour out as I don't think this one was right for me!


Let me know if what you do to spice up your nails and also if you would be interested in me doing some tutorial/nail pattern design things in the future! Thanks for reading.

Thursday, 22 August 2013

Review of 'NYC Quick Dry Nail Polish' in 'East Village'

Hi everyone! It's been ages (over a month!) since I did a post about NYC nail varnish so I thought I would pick one out from when I went through the mad phase of buying every single one and try it out! So the bottle on it's own is £1.79 but I picked all of mine up on a 2 for £3 deal is Superdrug.


So, this is a sort of bluey green shimmery colour as at the moment I'm going through a blue/green stage instead of playing it safe with pinks and purples like I usually do. I'd probably say it was more green in colour than blue - sort of turquoise although the picture doesn't seem to support my opinion!

Firstly I applied the base coat I always use which was £2.99 from Barry M.


I applied the first coat of colour and I was so shocked! I've used nail varnishes from this brand loads before so I know you always tend to need more than one coat but this was ridiculous! It has so transparent it was almost like it wasn't even on! I do apply thin coats but even so it was just unbelievable! This was when I realised it was going to take a fair few more coats than usual before I got anywhere near the colour in the bottle!

As it was so thin it dried super quick which was a bonus so I applied the second coat a little more thickly and as you can see it is starting to look a little better, although it's still not great! It's sort of the colour transparency I would expect from one thin coat from any NYC nail varnish not two!


Third coat now! It does look a lot better but I think it's ridiculous that I had to apply 3 coats before it got to this stage!


As it still wasn't the colour I wanted I applied one more coat of colour! 4 coats now! You shouldn't have to be applying 4 coats of any nail varnish regardless of price to achieve the colour it was intended to be.


I didn't apply a top coat because I honestly couldn't be bothered waiting for yet another coat to dry and I figured that 4 coats is anyway more than I normally do with the top coat included so it should be strong enough not to chip! I also didn't apply a top coat because I wanted to experiment with some nail beads!

Although I did like the colour and absolutely love the brand as it's so cheap I wouldn't really recommend this particular colour due to the sheer amount of time I had to wait between each of the 4 coats!

If you've tried  this or any from the NYC collection I'd love to know what you thought of them so leave a comment! Thanks for reading!

Wednesday, 14 August 2013

EuroQuest: Day 1 - Zagreb

Hi everyone! If you didn't already know this summer I have spent 2 weeks travelling around Europe which I was able to do through Girl Guiding (you can read more about how I got to do this and some background info and stuff HERE) and I thought I would tell you about what we got up to!

So the first place we went to was Zagreb in Croatia! On Wednesday 24th we all met up in London as we had a really early flight to Zagreb in the morning, so we thought it was best to stay in a hotel nearby that night. I shared a room with Emii and Frances and it turns out we are the most indecisive people ever! There was a single bed and a double and we couldn't decided who was sleeping where. After almost an hour we decided there was only one way to solve it - each of us wrote down our name and it went into a hat. As soon as this was done we went straight to bed because we had to be up super early.

Our flight was from Heathrow and in the airport we noticed a TARDIS and a Dalek (as you do) so of course after we had eaten we all rushed to get photos and the TARDIS turned out to be a photo booth but unfortunately it wasn't working so we just had photos outside it!

The TARDIS in the middle of Heathrow Airport
The flight was alright, but as soon as we walked off we were met with a gust of hot air. Now, England had been having a heat wave when we left but it was nothing compared to Croatia where I think it was in the high 20's/ low 30's.

We then went to find our hostel which was called the Fulir Hostel and it was actually really nice! I had never stayed in a hostel before and to be honest I was expecting the worst! We all stayed in a room of 10 in bunk beds and the room had a little en suit with a shower and there was a communal bath room there as well so it was pretty good!

The hostel we were staying in
We then went for a little explore around the various market stalls and I was surprised by how cheap everything was! The main price difference that I noticed was that a bottle of Heineken was being sold at the equivalent of just under £1.

As we were explore we met a man busking on some stairs close to where we were staying and he began to serenade us with the few English songs he knew before one of my leaders happily accompanied him as a backing vocalist!
Everyone joining in with Giovanni Furlan
As a group we had a look around the church that was close to where we were staying and I absolutely loved the architecture, especially the detailing on the door way! It was so cool inside that we just wanted to stay there to avoid the heat that was waiting to greet us as soon as we stepped outside again.

The detail on the entrance to the church
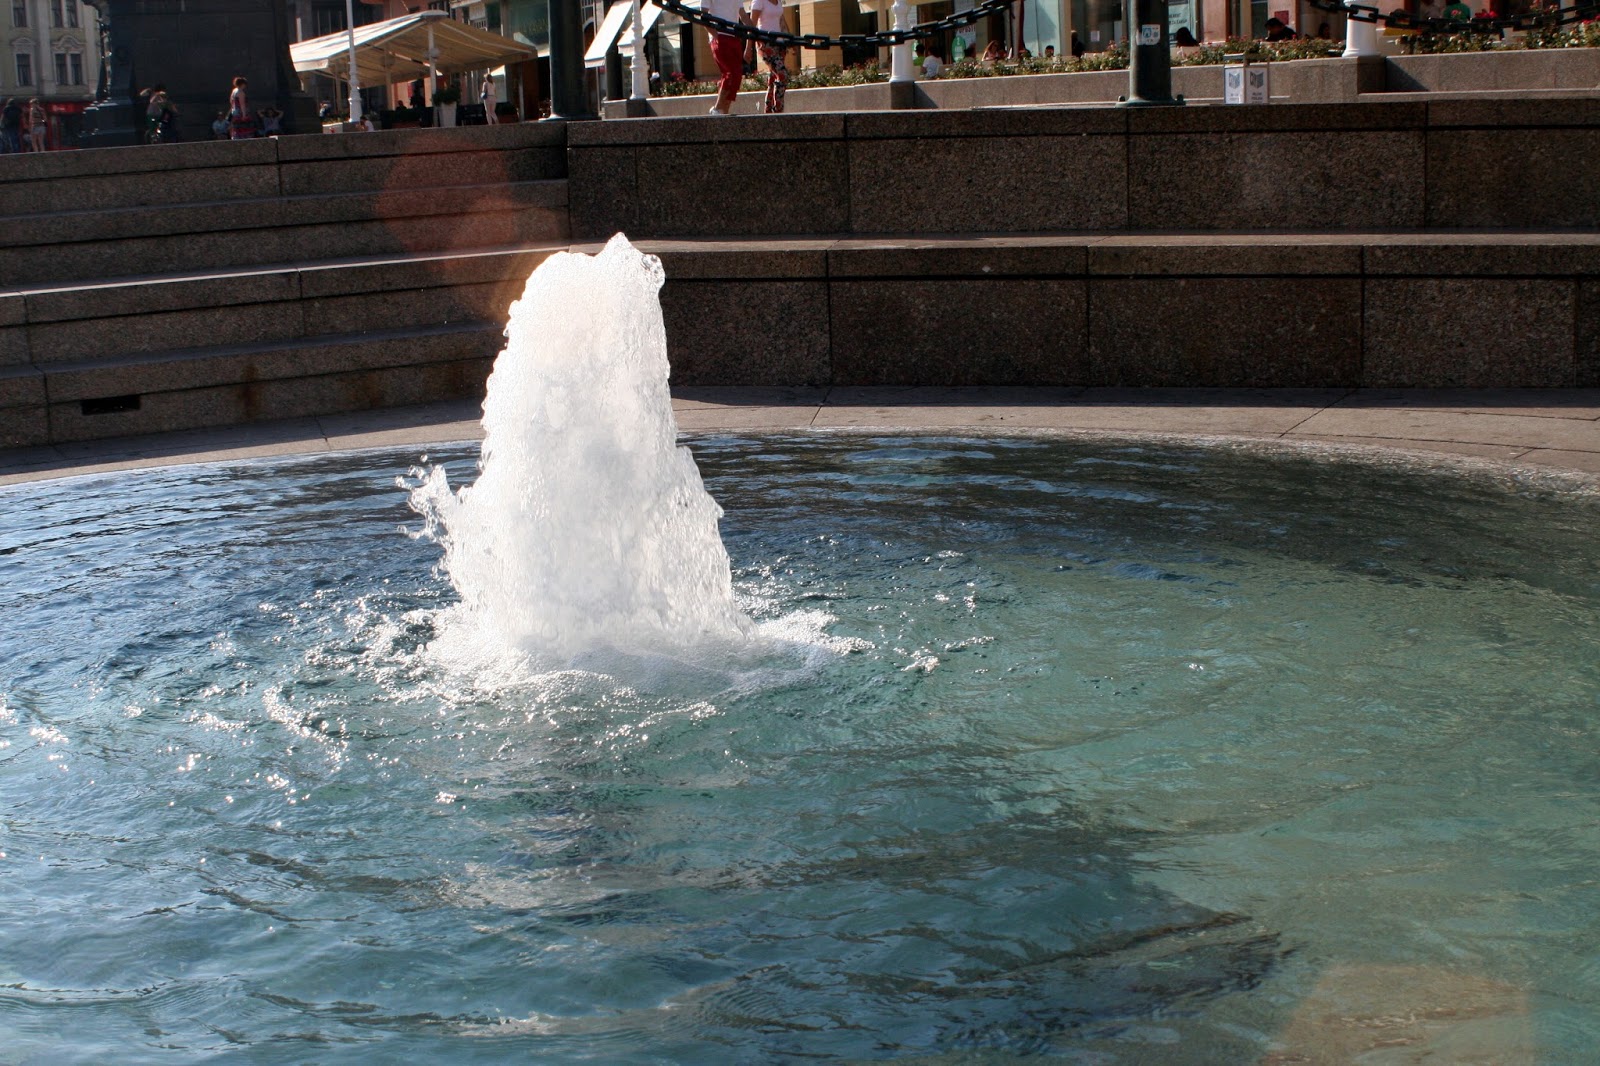
We then went off in our own two groups of 5 to explore the city ourselves. And the first thing we did was to go get ice cream - I like to think we have our priorities sorted! Then we basically went for a walk, nipped into a couple of shops including an art shop where the sold ink along with a whole manner of art utensils for literally pennies. We stopped in a park to enjoy the sun and walked through several others on the way back which had gorgeous fountains where many people were dipping their feet in as an attempt to cool off!

Cooling fountains
We then went to a really nice restaurant where I had a huge margarita pizza but throughout the meal there was a fly buzzing around! The amount of times that we attempted to catch the fly in bottles, glasses and whatever else was on the table but alas we failed.

Not the restaurant we went to but the place next door!!
We ended our first day there by going on a little adventure on a Noddy train which did a little tour around the city, which was nice. When we got back we decided to do the Pony Song in the middle of the square and by the end we were absolutely melting. The Pony Song is one of those camp fire songs that we do as Guides and Rangers but for most of us, we had never heard it until the selection weekend!

The noddy train
If you want to see more I filmed a bit of what we were doing so you can check that out here:
The video is a montage of several clips and pictures throughout the time we spent in Zagreb as apposed to these blog posts which a split by day.

ZAGREB VIDEO: COMING SOON

I hope you enjoyed reading this and feel free to leave any comments!